Svalbox Bookkeeping#
Keeping track of data is as important as the data themselves. For this reason we have established a basic bookkeeping layer in the Svalbox database. The goal? Keeping track of data acquired in the field - as well as their temporary storage location!
How to contribute to the Svalbox Bookkeeping Layer (SBL)?#
The Svalbox Boookeeping Layer (SBL) is accessible through the Svalbox PostGIS backend and frontends that can connect to the PostGIS server. Perhaps the easiest and most straight forward way is to use QGIS, which we illustrate below. In practice, however, any software connecting to the SBL with the right credentials can edit the table, so go with your best flow :).
Required SBL metadata#
The following metadata are required for the SBL table:
name: Locality name of where the data was acquired
uri: Unique identifier for the data; for DOMs this is typically the SketchFab ID. This field may be in a list form, using the “;” (semicolon) to separate entries.
file_location: The location where to find the raw data; preferably in file path on the Svalbox server. Remember that this is useable not just for you, but to all those looking for the data!
data_type: Pick the data type; examples include DOM, DCM, DSM (digital sample model), image_360, video_360, etc.
processed: Tick if this data has been processed/is ready for QCing and uploading.
QCed: Tick if this data has been QCed and is ready for uploading. This includes not only the data quality assurance, but also compilation of all relevant metadata.
uploaded_to_DB: Tick if the data has been uploaded to the Svalbox Database. Ticked data will be removed at regular intervals.
declined: Tick if the data has been declined for uploading/processing/Qcing.
folder_size_in_gb: Size of the item/data set in GB.
geom: Point geometry of where the data was acquired, filled out automatically if picked in QGIS.
id: unique identifier of the data; filled out automatically by QGIS.
Seeing as these are all required prior to publishing, make sure to have these lists handy!
The Github way#
To be done - information on posting of all datasets on the Github Svalbox discussion pages for referencing.
The QGIS way#
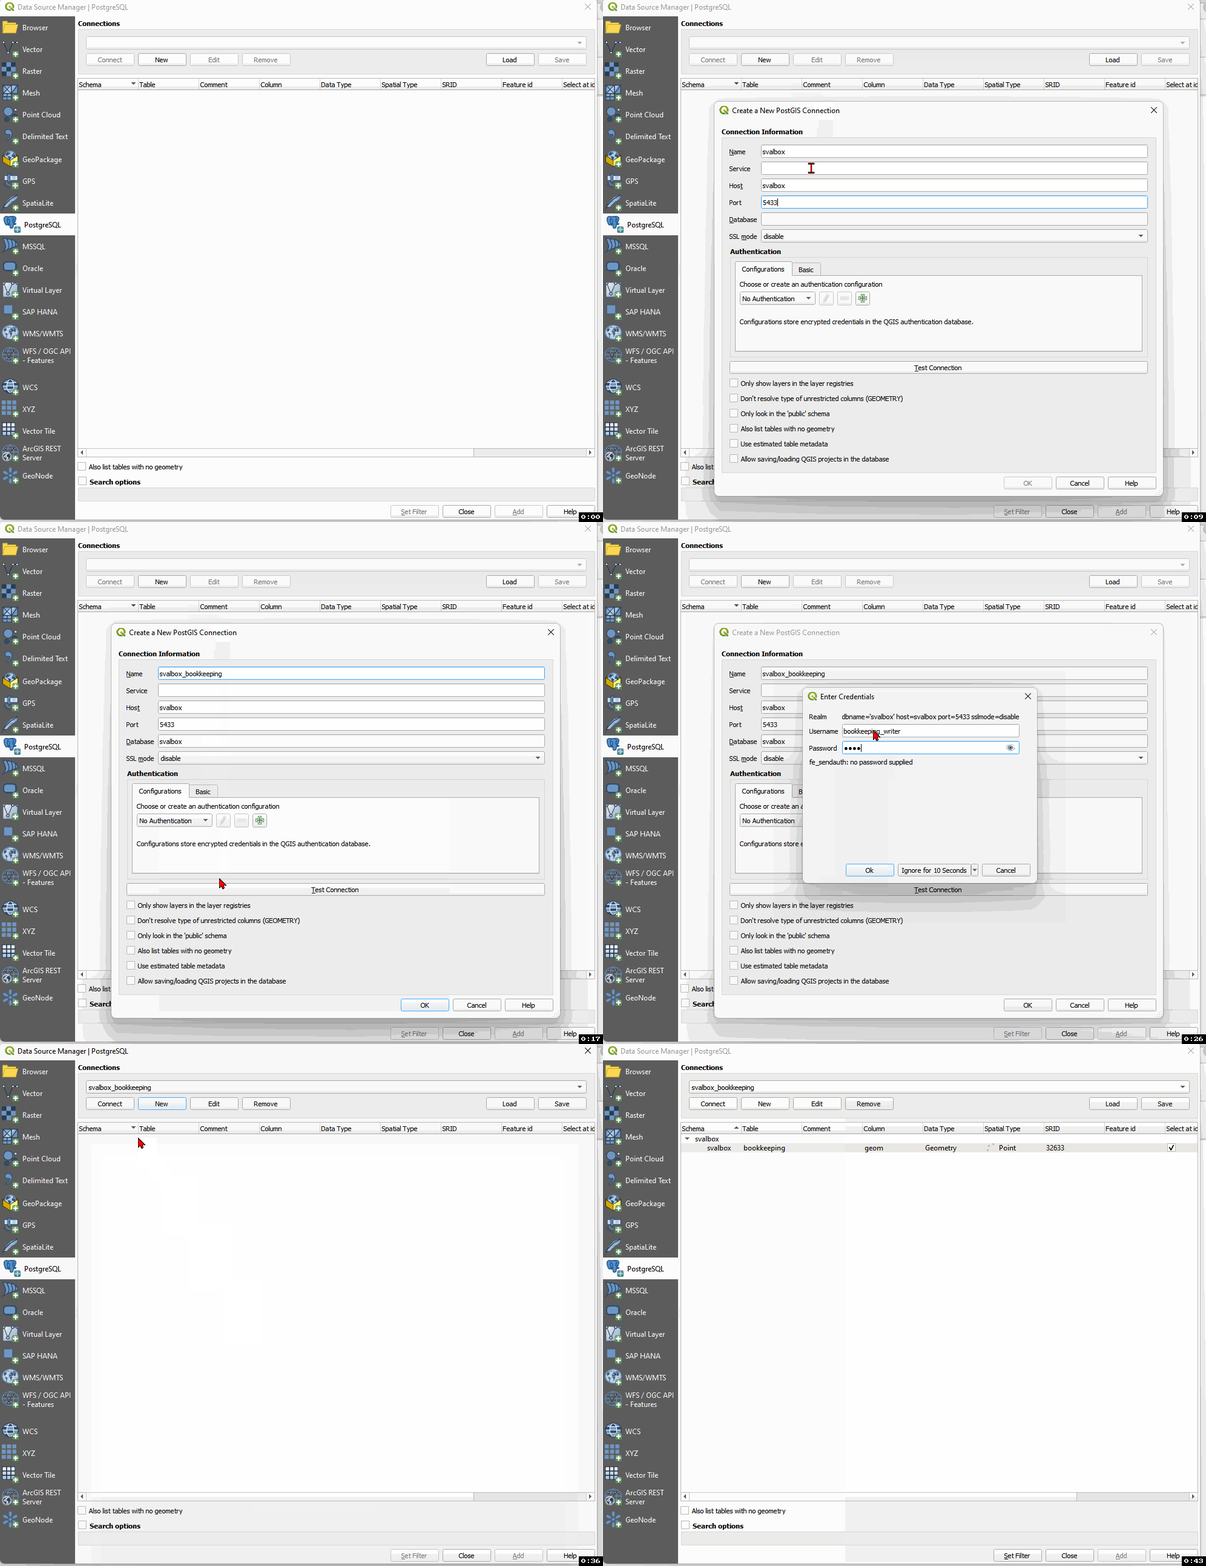
The easiest way is to connect to the SBL table by connecting to the Svalbox PostGIS server, see Fig. 17. The connection uses a limited-access account called Bookkeeping_writer, which only has write access to the SBL table. A password is provided for those that need access, and can be found ine Svalbox Password Manager (bitwarden).

Fig. 17 Connecting to the Svalbox DB. The bookkeeping_writer account is used for editing of the SBL table; please ask the Svalbox admin for the password.#
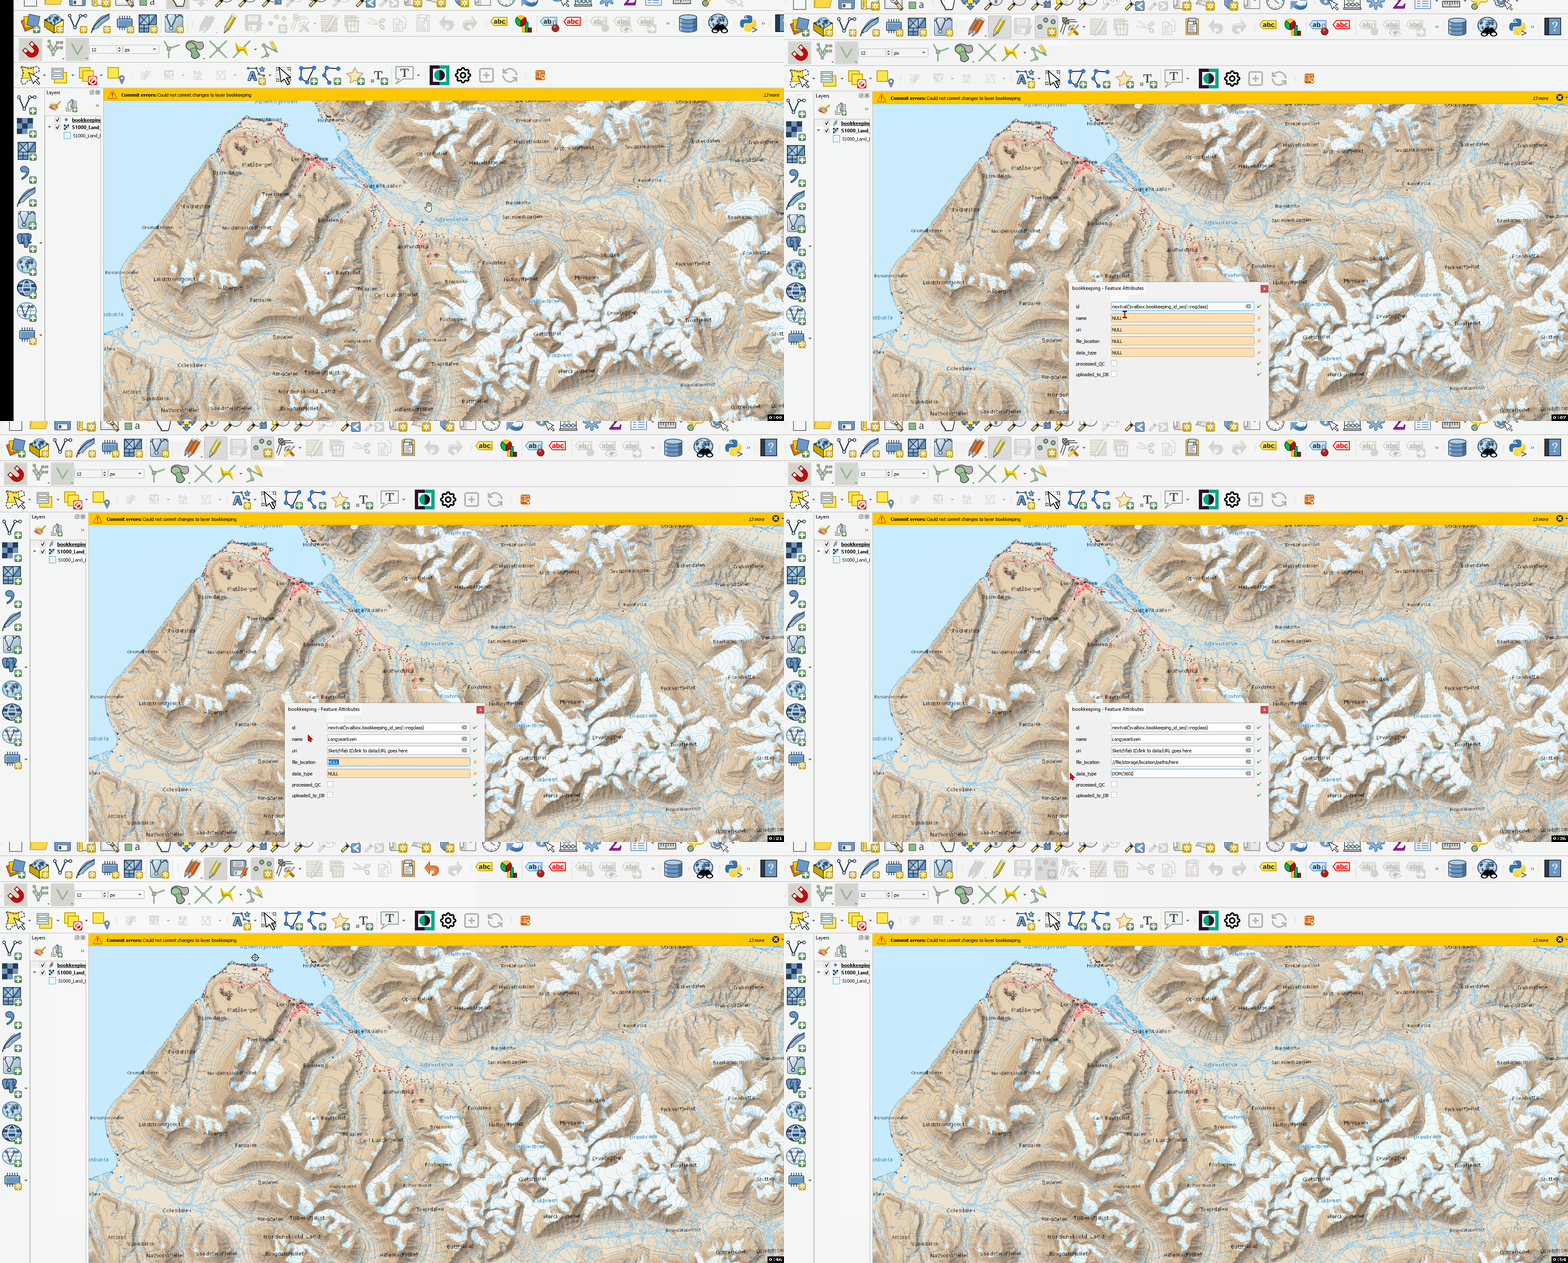
After adding the layer to your QGIS project, you may proceed with the editing of the SBL table. Fig. 18 visualises the workflow for this. Keep in mind that the table’s attributes (see Required SBL metadata) may change over time, so think before just copying the example!

Fig. 18 An example filled out for the hypothetical Longyearbyen data set.#
It is important to frequently save your progress to the SBL table!
(Post-)Editing of the SBL#
You may edit previously created points with the Bookkeeping_editor credentials. These need to be provided when connecting to the Svalbox PostGIS server as seen in Fig. 17.
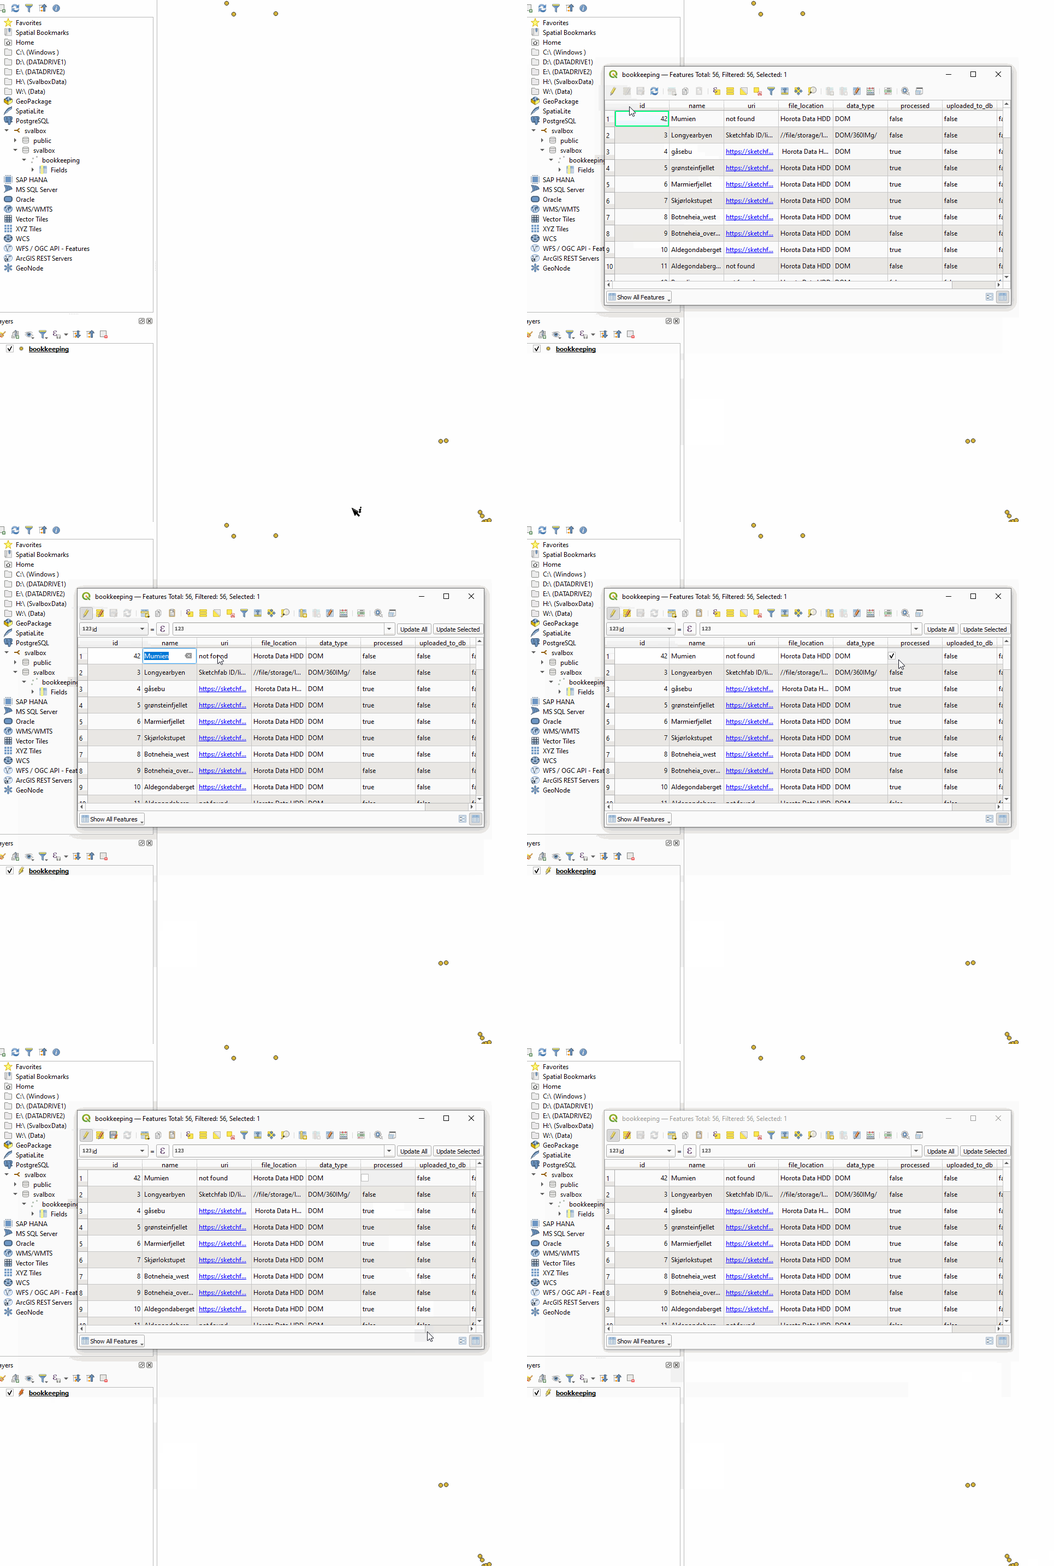
Fig. 19 illustrates how the attribute table of a feature can be opened in QGIS. The animation illustrates the editing of the SBL, which is used to keep track of unpublished Svalbox data.

Fig. 19 Accessing attributes of a layer, editing the attributes, and saving the layer in QGIS.#
Remember to frequently save changes that have been made, while at the same time making sure that only correct revisions have been made. Once done, make sure to exit the editing mode my clicking the pencil icon once more, to leave the layer in the much safer read-only mode. The Svalbox DB takes care of people editing the same data elsewhere, so no need to worry about things.
Reporting data sizes#
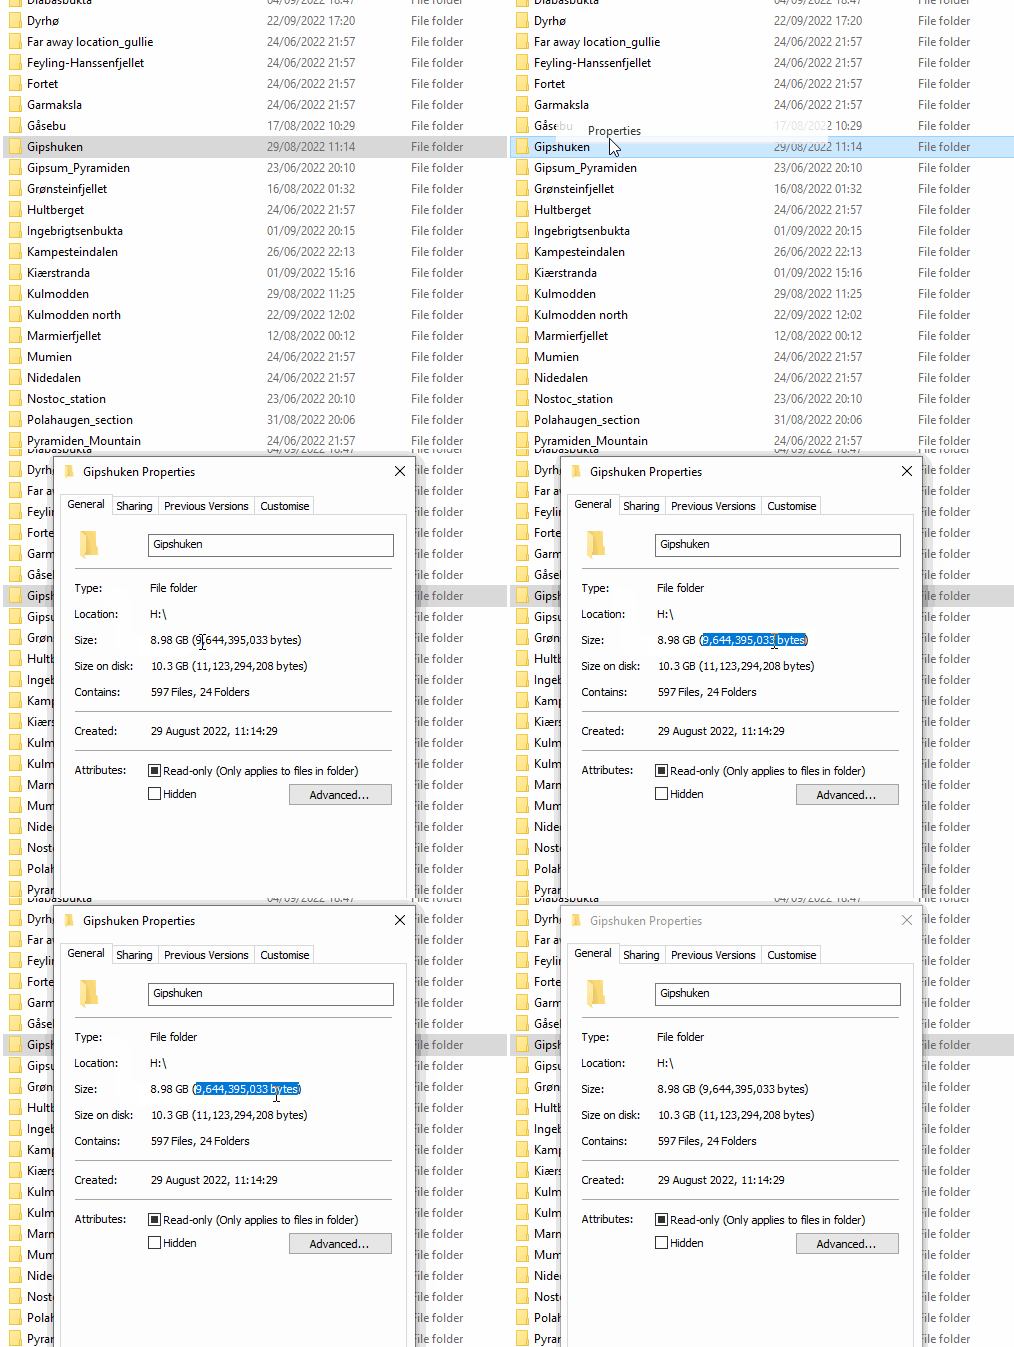
Fig. 20 shows how to get the folder size in windows. The SBL requires the folder size to be filled out in GB.

Fig. 20 Checking folder size in windows.#
This is the number of bytes highlighted in Fig. 20, which you divide by 1 000 000 000, and then round up. An example of this for the Gipshuken dataset is shown in Fig. 21.

Fig. 21 Write down folder size.#
Keep the SBL updated
Make sure you keep the metadata in the SBL tables up to date… Exported a model or removed some photos? Then it is important to recheck the folder size while checking the processed/QC boxes.
